Table of Contents
The administration panel is the core components of the system, it lets you modify Webcampak behavior.
Before beginning Webcampak configuration it is always better to clearly define your objective, you might find useful to draw a diagram displaying interactions between sources and modifications to be performed.
There are two kind of settings within Webcampak:
Global settings, shared between all sources and impacting the whole system, are configured via "System" menu and its sub-sections.
Source-specific settings, different for each source, are configured via "SourceXX" menu and its sub-sections. A modification there only impact the selected source.
This part of the document will detail all settings, menus and sections available, if you feel that additional explanations are necessary or if you have any comments just let us know.
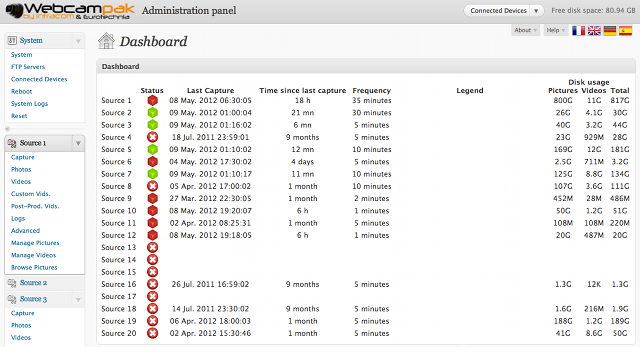
The dashboard will be the first page to be displayed when you connect to Webcampak.
It provides you with a global status of each source, time spent since last capture and disk space used by sources.
"Status" column provide an estimation of the source's status:
a white cross is displayed if the source is disabled,
a red cube is displayed if there is more than 3x the capture frequency between current time and last capture,
a green cube is displayed if there is less than 3x the capture frequency between current time and last capture,
